

How To Seal Up Basement Windows
Winter months are known for their chill. As a effect, well-nigh homeowners put in more than effort to insulate their homes during this season so that precious warm air isn't lost to the outdoors and cold doesn't infiltrate into the house. I've put together 6 affordable ways y'all tin can seal your basement windows during winter in order to better the temperature in your basement and the overall temperature of your abode.
ane. Install New Weatherstripping
If your basement windows feature damaged or missing weatherstripping, so you should consider installing new weatherstripping. This would not just prevent cold drafts but would also prevent insects and grit from entering your home through the gaps in your window.

The outset pace in weatherstripping windows is to remove whatever old weatherstripping, clean the surface, and expect for it to dry. This way, the material firmly adheres to the surface.
There are a couple of different types of weatherstripping options bachelor to y'all. Most cost between $5 and $xxx dollars, so it is an constructive and affordable option.
Y'all'd take to use weatherstripping in line with your window type. If your basement windows feature a double-hung design, and then you lot'd have more angles to cover than if you're dealing with a casement window.
| Type of Weatherstripping | Fabric | How to Install | Pros | Cons |
| Foam tape (amazon link) | EPDM safety or closed-cell foam | * Measure the top and bottom window sash. * Cut the foam tape using a utility knife in line with the window's measurement. * Peel away the backing and printing the cream into place. Note that the foam comes in various thickness levels. So, choose ane suitable for your window. | * Inexpensive * Easy to install. * Suitable for both casement and sliding windows. | * Lasts just upwardly to five years and could wearable out within a year. * Isn't suitable for windows that experience constant traffic. * Might not be aesthetically pleasing. * Could lose its grip over time and start pulling out of the window frame. |
| V strip/tension strip (amazon link) | Vinyl, aluminum, plastic, or stainless steel | * Measure the height of the outer sash and the bottom of the inner sash. * Cut the tension strip, adding an additional 2 inches to the measurement of the v-strip. * Peel the backing off the strip. * Printing down the adhesive side of the strip to the inside of the window sash. *Don't stick the actress inch to the inner sash; instead, attach it to the underside of the sash. * Secure with nails for added protection. | * Durable * Blends into the window so it would non interfere with the decor. | * Could brand window hard to open/close. |
| Felt weatherstrip (amazon link) | Felt | * Measure your window sash. * Cut out the felt in line with your measurement. * Staple or nail the cloth into place. | * Easy to install. * Inexpensive | * Only lasts up to 2 years * Isn't suitable for windows prone to wet and chafe. * Is not aesthetically pleasing. |
| Tubular gasket (amazon link) | Flexible safe or vinyl | * Measure the outside edges of your window. * Cutting out enough gasket to comprehend the measured surface area. * Position tightly, and nail or staple in identify. | * Ideal for large gaps. * Durable | * Cannot be painted over to alloy with existing decor. |
| Spring metal (amazon link) | Statuary, aluminum, copper, and stainless steel | * Measure the window sash. * Cutting the amount of spring metal needed for the top and bottom of the window. * Place information technology so that the apartment side faces the interior bending of the window while the leap side faces the exterior area. * Cut out any part that might affect the movement of the window. * Nail the jump metal into place. * Use a screwdriver to gently bend the metal for increased tightness where necessary. | * Durable * Tin can last for years. * Platonic for moisture and traffic-prone windows. | * Difficult to install. |
Note that all the weatherstripping options above accept differing features. Thus, y'all'd have to examine your window and then select a solution that works best for y'all.
Weatherstripping windows tin can salve energy costs by upwardly to x%.
2. Shrink Flick
Shrink films are one of the easiest and most cost-effective ways to weatherize your basement windows. The process involves covering the window with a plastic sheet so that it prevents cold air from inbound the room. The film essentially acts as a weather barrier so that air doesn't pass through the window.

Still, it should be noted that this is only a short-term solution and should be removed afterward wintertime is over and so that you can open your windows during warmer months.
You can either apply the film on the interior or on the exterior side of a window. But most homeowners prefer installing the moving-picture show indoors.
Yous would need:
- Window insulation kit (amazon link)
- Pair of scissors (amazon link)
- Blow dryer (amazon link)
- Tape measure (amazon link)
How to install shrink movie:
- Make clean the window with a wet towel to remove clay and dust.
- Leave to dry out.
- Measure the window, adding an extra ii″ to requite room for shrinkage.
- Cut the film to match.
- Utilise double-sided tape (would be in the insulation kit) effectually the edge of the window frame, pressing it firmly to help information technology stick.
- Remove the record liner.
- Starting from the tiptop of the window, install the motion picture and press it firmly to the record.
- The hairdryer will be used to shrink the film and remove wrinkles (careful non to let the dryer touch the film).
- Cut excesses around the edges with scissors.
Depending on what blazon of shrink wrap you apply, the country of your window, and the weather condition condition in your region, a shrink pic tin reduce energy consumption upwardly to 15%.
Shrink films price between $10-$20. Window insulation kits cost more than, usually betwixt, $15-$30, and contain fewer plastic films. But information technology contains enough films to seal multiple windows.
Alternatively, you can insulate your windows with bubble wrap (amazon link) .
How to install bubble wrap:
- Make clean the window.
- Measure your window glass.
- Cutting bubble wrap to fit.
- Using a spray bottle, lightly spray the window glass and the bubbly side of the wrap with water.
- Install the bubbly side of the wrap to face the window and the smooth side to face the room.
A downside of using bubble wrap is that it isn't as imperceptible every bit a shrink film.
3. Tape the Windows Shut
If yous're not worried about aesthetics and need a seasonal seal for your basements windows, you can opt for this solution. Information technology involves completely covering the window with plastic or silicon adhesive tape (amazon link) .

This method involves placing adhesive tape straight on the glass. As a result, when it's removed, the tape would most likely get out sticky adhesive residue, which might be difficult to get rid of. More than so if the tape is left on the window for a prolonged period.
How to record windows:
- Lock the window.
- Clean the glass to remove dirt.
- Install the tape on the windowpane, avoiding folds or wrinkles.
- Tape the sash and edges of the window frame as well.
- Press down to ensure that the record properly adheres to the window.
If you are unable to detect a product designed for windows, you lot can use agglutinative door seal tape to insulate your windows. The record is cheap and costs as low equally $7; nonetheless, depending on the quality of the product, the tape could cost upward to $15.
A major downside of taping windows is that you automatically render the window non-functional because the procedure implies that the window will be sealed shut until you decide to take off the record.
If yous desire to run into through your window, then you'd have to go a transparent tape.

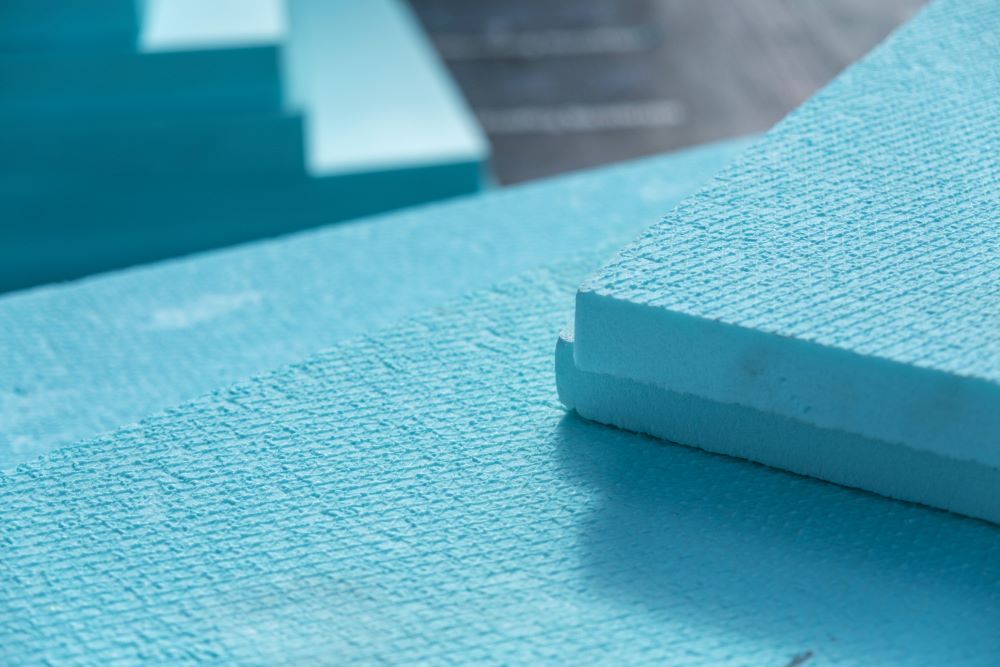
4. Embrace with XPS Cream Lath
Rigid foam is usually applied on exterior walls to insulate and improve the thermal backdrop of a house.
In that location are a variety of rigid foam board options that yous can use to seal your basement window. However, Extruded Polystyrene (XPS) is the almost ideal option for below-grade insulation due to its high wet resistance. Installing it over your window non merely prevents air leaks, but it would also protect your window from the moisture that is then frequently an outcome in basements.
Although you can install the XPS board inside, it's best to install the protective layer on the exterior side of the window. This fashion you lot protect your window from frost impairment, specially in regions that experience heavy snowstorms.
Notation that if you make up one's mind to use fiberglass instead of a rigid foam board, you tin can but install the insulation within the house. This is because although fiberglass functions every bit an constructive thermal bulwark, it is vulnerable to moisture.
Thus, if you utilise fiberglass on your exterior window, especially during winter and moisture penetrates through its layers, the chilly liquid would settle on your airtight window until you remove the lath. This might not bear upon high-quality window panes, simply if the glass is inferior, it could cause damage to the window.
You would need:
- Foam board adhesive (amazon link)
- XPS foam board (amazon link)
- Measuring tape (amazon link)
- Round saw (amazon link) or serrated knife (amazon link)
How to encompass windows with XPS foam board:
- Clean the window to remove grit and dirt.
- Mensurate the length and width of the window.
- Cut the board to fit.
- Apply the adhesive to the window edges. Use a manufacturer-canonical adhesive like this one (amazon link) .
- Fit the board and press down to ensure that it adheres firmly to the window.
- If your window has multiple panels, you might accept to cutting the board to fit each individual console.
This method wouldn't exist ideal if y'all practice not want to completely shut off the window. This is because installing an XPS lath implies that you close out sunlight every bit well equally the exterior view.
Information technology would cost betwixt $15-$30 if you lot already ain a serrated knife/circular saw.
Notation that some states have laws confronting leaving cream boards exposed considering they are combustible and create health and safety hazards. The boards are to be covered with drywall or paneling.
five. Caulk the Windows
Caulk is a household favorite of DIYers. It's platonic for closing gaps and cracks that are less than 1/4" wide. If in that location are gaps around your basement windows, you can shut them with caulk. Or you could simply apply caulk effectually the unabridged perimeters of your windows and so that smaller openings that are non detectable wouldn't expose your basement to the frigid air.

Tips for using caulk in winter:
- Regular caulks might not be suitable for the chilly weather condition so it'southward best to use a silicone caulk.
- If you're applying the caulk on your exterior window, pick a time when it's non snowing.
- Don't utilise caulk on wet surfaces. Information technology could lose its adhesiveness if applied on damp surfaces.
- If you exercise not want the caulk to affect the facade of the window, you can opt for articulate silicone caulk.
- For exterior applications, utilize an exterior grade caulk (amazon link) .
You would need:
- Putty knife (amazon link)
- Caulk tube (amazon link)
- Caulk gun (amazon link)
- Plastic spoon
- Wire or long nail
How to seal windows with caulk:
- Utilise a putty knife to detach old caulk.
- Brush off whatsoever debris and clean the surface with a towel dipped in soapy h2o.
- Insert the caulk into the gun.
- Cut the nozzle to conform your desired bead size. Usually, 1/4" is ideal.
- Using a long wire, poke a hole in the caulk to release the sealant.
- Apply the sealant around the perimeter of the window by consistently pressing the trigger.
- For vertical applications, outset from the top and progress toward the bottom of the frame.
- Flatten the sealant with a plastic spoon (optional).
For all-time results, use caulk on both the interior and exterior window joints.
For additional protection, you tin temporarily seal off the window with removable caulk. The caulk would seal the windows and forbid air from inbound your basement through the gap betwixt the sill and the window frame. However, this procedure implies that you would be unable to open or close the window until yous remove the caulk.
A major downside of insulating windows with caulk is that it does not account for air leaks due to faults in the window itself.
You can double up your weather protection by applying caulk on your outside window and installing a shrink film on the interior.
Caulk Exterior Molding
The problem might exist your exterior molding. If you notice gaps between your molding and wall or your molding and window frame, then yous should apply caulk over them.
If your outside molding is old, information technology might feature cracks or holes. A temporary solution to this would be to employ caulk over the imperfections.

For an air-tight seal, apply caulk effectually the 4 corners of the molding. It'southward all-time to cover both the joints between the molding and the wall likewise equally those between the molding and the window.
Information technology costs betwixt $10-$35 to caulk a window. The cost would be less if you already own a caulk gun.
six. Hang Thermal Defunction
Also referred to equally insulation curtains, thermal curtains (amazon link) prevent interior warmth from getting lost to the outdoor and restrict the penetration of chilly outdoor air.
They are commonly made from moisture-resistant materials like polyester or microfiber.
Thermal curtains comprise multiple layers of fabric. Ordinarily, three layers, the first layer is solely decorative and faces the room, the second layer is composed of a thermally resistant material and the third layer acts equally a protective backing that protects the inner layer from sun and wet.
Tips for installing thermal curtains:
- Avoid unmarried-layered drapes. Instead, go for defunction with double or triple layers.
- Measure your window before purchasing the curtain.
- Purchase defunction with thick fabrics. Thermal curtains with flimsy materials do not provide equally much insulation as those with thicker fabrics.
- Open the window occasionally to prevent moisture build-up on the curtain'due south vapor bulwark.
- The curtain can be cleaned while they're installed with a vacuum and upholstery cleaner.
- Ensure that the drape covers the window completely.
- Install the drape close to the wall, so that in that location is no gap for air to escape through.
- Defunction should overlap in the center. There shouldn't be a gap between them.
- Defunction should driblet to the floor.
- Install a valance or cornice higher up the drape to limit air leaks.
- For improved insulation, secure the drapery to the frame with magnetic tape or hooks.
A major advantage thermal curtains concord over the other solutions I've discussed is that they perform multiple functions. They essentially limit the upshot of outside weather on your home's temperature. During summer, they forbid the heat of the sun from entering the house.
")
Aslope their thermal functions, they also dampen sound and filter out sunlight. Thus, the defunction are useful all year round, which more makes up for their cost.
However, if you take drafty windows, thermal curtains might not exist enough to protect your basement from the winter chill. If cost isn't a problem, you can combine thermal curtains with any of the other sealing methods discussed in this article.
The price of thermal curtains depends on factors similar the quality of the materials used and the length of the curtain. Just they are normally priced between $20-$45.
Sources
https://world wide web.energy.gov/energysaver/do-it-yourself-savings-project-weatherstrip-double-hung-or-sash-windows
https://world wide web.energystar.gov/campaign/seal_insulate/plastic_over_windows
https://www.free energy.gov/energysaver/do-it-yourself-savings-project-weatherstrip-double-hung-or-sash-windows
https://www.exteriormedics.com/blog/warm-up-your-windows-insulation-tips-tricks
https://modernize.com/homeowner-resource/windows/the-best-low-cost-ways-to-insulate-your-windows-this-winter
https://eikenhout.com/how-to-caulk-windows-for-wintertime/#:~:text=You%20can%20buy%20caulk%20as,cold%20air%20into%20your%20home.
https://world wide web.lowes.com/n/how-to/weather condition-strip-windows
https://world wide web.energy.gov/energysaver/weatherstripping
https://world wide web.dmdbuilders.com/do-blackout-curtains-assistance-keep-the-estrus-in-during-winter-months/#
Source: https://hvac-buzz.com/ways-seal-basement-windows-winter/
Posted by: meldrumnobece.blogspot.com
0 Response to "How To Seal Up Basement Windows"
Post a Comment