

How Do I Open My Ps4 To Clean It
If you are making the game console disassembly for the first time in your life, pay attention to this tutorial — First time repairing
Step-by-step guide for disassembling the PlayStation 4 game console of the first model, the so-called FAT revision, which includes the following ps4 models: CUH-1001A, CUH-1003A, CUH-1100A, CUH-1115A, CUH-1116A, CUH-1208, CUH -1215A, CUH-1215B.
The serial number and model number of PS4 you can found on the gaming system, as well as on the box. At the end of the page, there is a video instruction on how to assemble the PS4 after disassembly.
To disassemble the PS4 you will need two types of screwdrivers:
- Torx T8 / T9
- Phillips PH0 / PH1 Also
- Tweezer – will be useful
In this step-by-step instruction, we will disassemble the ps4 for cleaning and replacing the thermal paste, also you can replace any components, for example, how to remove hard drive, power supply or fan. If during the disassembly process it is not clear how to perform step, you can see the step-by-step video instruction below.
Guide How to disassemble PS4
Remove the top panel of the PS4 case. It is easy to remove, just pull up until the clamps open.

Remove one screw that fixes hard drive basket. In addition, remove the hard drive.
On the backside of the PS4, where the connection ports are located, remove stickers, and below them screws that we need to unscrew.

Now unscrew the four screws, and for this use the T8 Torx screwdriver.

Next, remove the cover of the PS4 case. Start to open the case from the same side.

On the backside of cover, you can see dust. Use a brush or napkin for cleaning the case from dust.
Let's remove the power supply of PS4 game console. First, unscrew three screws T8 Torx. Then unscrew two screws using PH0 screwdriver.
Disconnect four-wire connector from the power supply. The connector is fixed quite tightly, and if you cannot get it as easily, to disconnect the cable use tweezers.

Next, using a plastic tool, pull up on the right side, then on the left side. The right side of the power supply will be harder to pull up.

If there is a lot of dust inside the power supply, it is better to remove this dust. To do this, unscrew the two screws on the power supply and open it for cleaning.
Disconnect the blue-ray drive cable from the PS4 motherboard. To do this, press the tweezers onto the iron plate and pull the cable to the side.

Next, unplug the optical drive power connector by lifting it up. In addition, disconnect the Wi-Fi antenna from the motherboard.

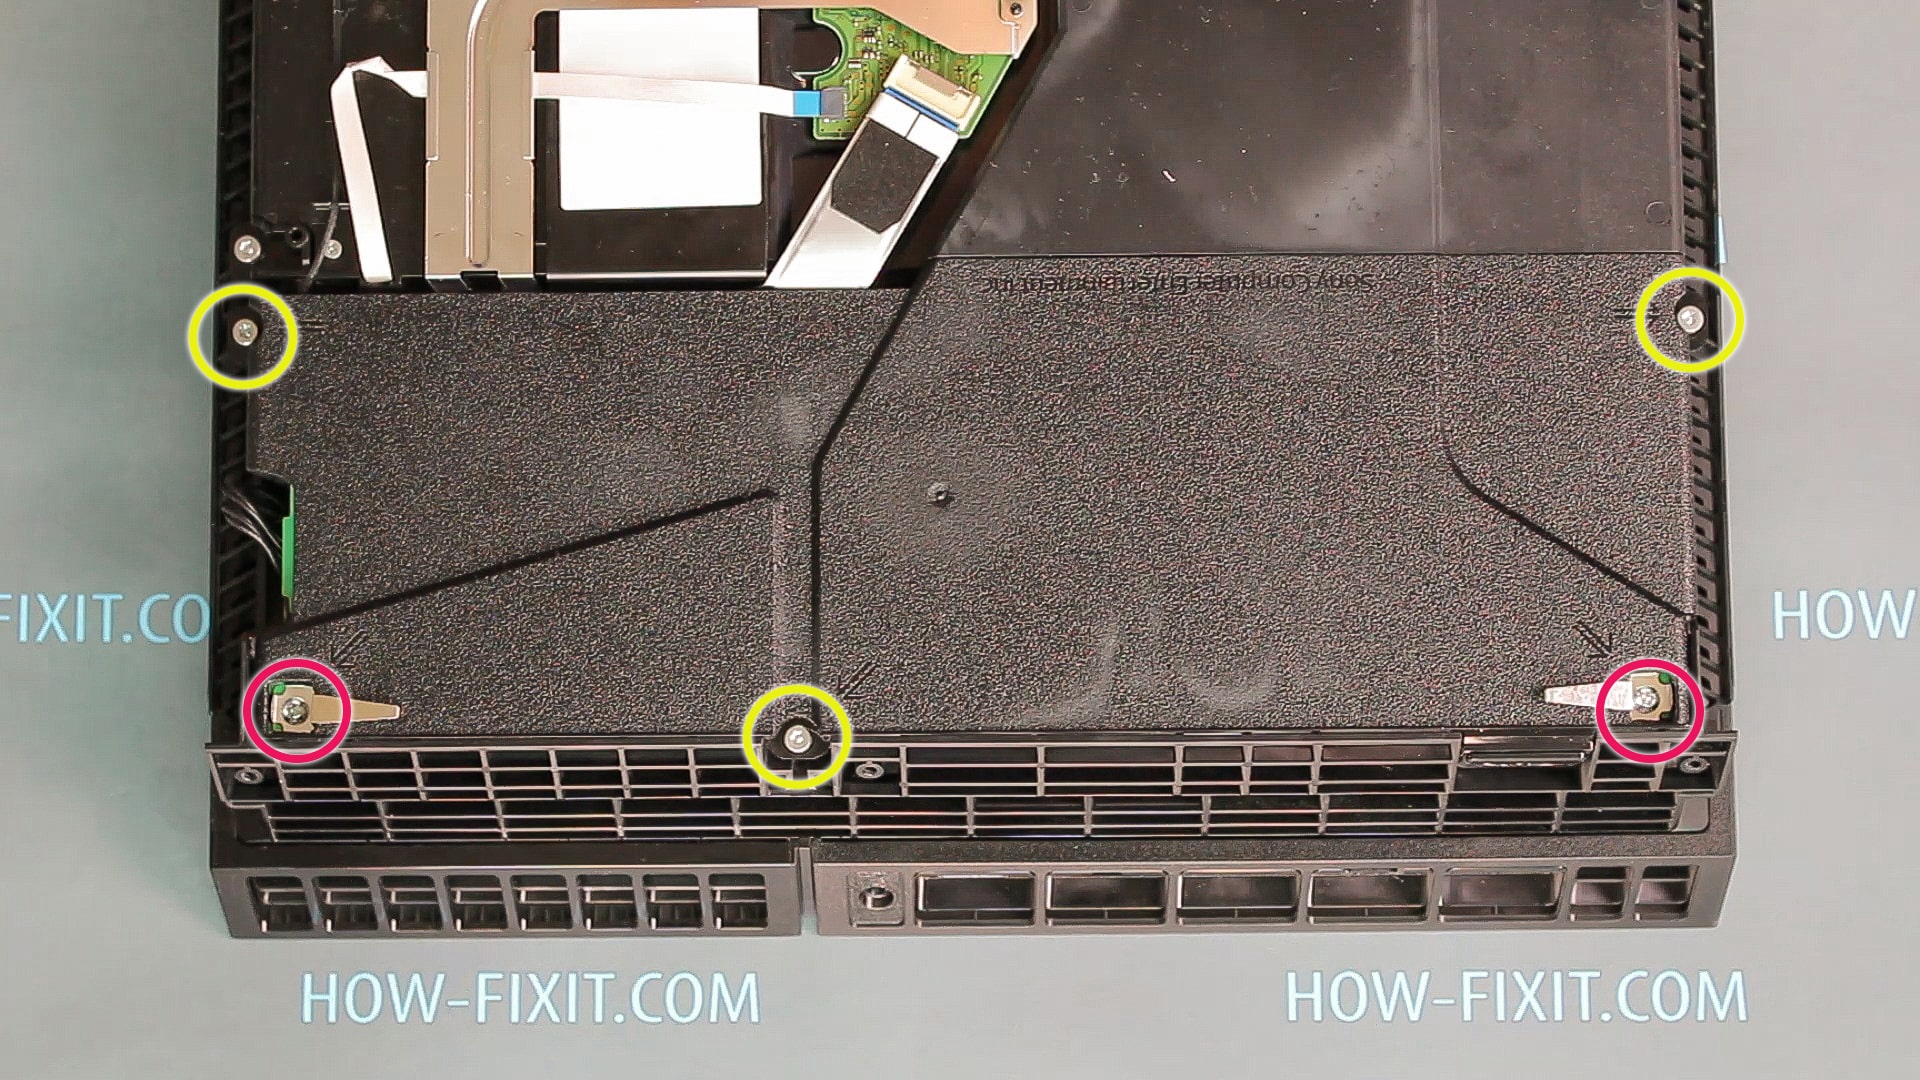
Remove the two screws securing the top cover to the PS4.

Grab underneath of the top cover near the power button. Pull up…you will hear it click as you pull up. Move to opposite side of the top cover PS4 and pull up here as well. After, just lift up cover.

Remove 12 T8 Torx screws (marked in yellow).
Using PH0 screwdriver and unscrew the last two screws (marked in red).
Disconnect the fan cable from the motherboard (marked in green). The cable turned off by lifting up.

Next, remove the top metal panel. Now pay attention to the thermal pads, it is very important not to lose them when removing the panel.
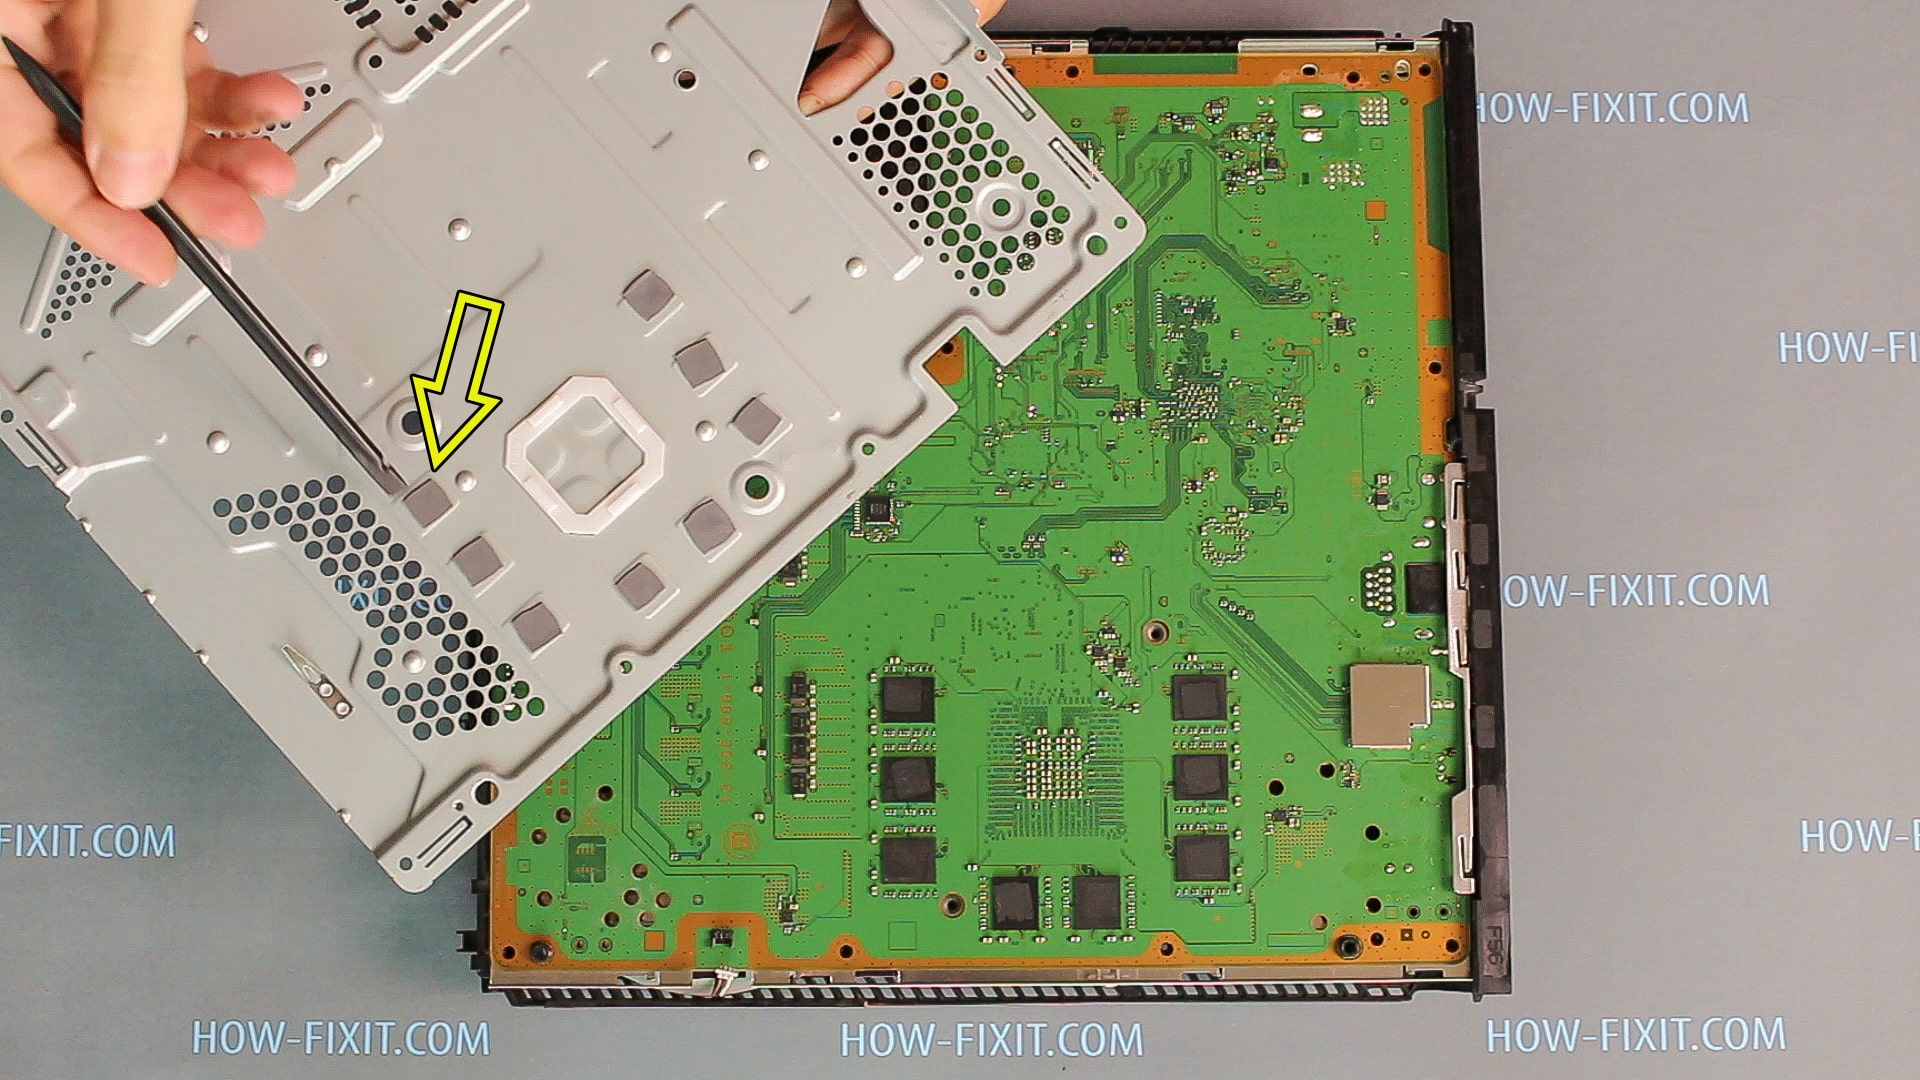
Gently lift up PS4 motherboard. Also, pay attention to the thermal pads and be careful, do not lose them if they fall. Remove the old thermal paste from metal panel and from the CPU on the PS4 motherboard.

Apply a small amount of thermal paste to the surface of CPU. Next, distribute the thermal paste on entire surface of CPU.
Use plastic or wooden object, not metal.

Now move on to cleaning the cooling system from dust. Remove three screws on the metal panel.

After lift up the metal panel. With the brush, remove dust from the radiator.

The next step is to clean the fan. To do this, you need to unscrew the two screws, and now the fan you can remove and clean from dust.

Clean fan from dust using a brush.

Disassembly is finished, now we need to assembly everything back. Watch the video guide on PS4 assembly.
PS4 assembly
General steps:
- Install the fan cable into the PS4 case and secure two screws.
- Install the panel with a radiator and securing three screws.
- Install the PlayStation 4 motherboard on the metal panel in the PS4 case. Pay attention to the thermal pads that everyone would be in place.
- Next, install the second metal plate on the PS4 motherboard. Also, check the thermal pads.
- Install the holder screwing the bolts evenly, a few turns on each side.
- Take a Torx T8 screwdriver and secure 12 screws.
- Connect the wire from the fan to the motherboard.
- Install the bottom plastic panel of the PlayStation 4 case.
- Fasten two screws.
- Install the hard drive in the PS4 case and secure one screw.
- Install the glossy top cover of the PS4.
- Connect the optical drive power cable to the PS4 motherboard.
- Connect the Wi-Fi antenna to the PS4 motherboard.
- Connect the blue-ray drive cable to the PlayStation 4 motherboard.
- Connect the wire to the power supply and install the power supply in the PlayStation 4 case.
- Take two long screws, install them in the power supply and secure with a PH0 or PH1 screwdriver.
- Next, take the Torx T8 and secure three screws on the case of the PlayStation 4 power supply.
- Install up the rear plastic cover of the PlayStation 4.
- Fasten the Torx T8 screws on the rear end of the PS4 case.
- PS4 assembled!
Disclaimer:
This information is provided for informational purposes only. We accept no liability for damage caused to your device while following the video instructions. Also note that if your laptop or any other device is still under warranty period, then in the process of dismantling the guarantee may be canceled because traces remain after disassembly and it violates the terms of the warranty period. Before disassembling, make sure that the warranty on your laptop has been over.
How Do I Open My Ps4 To Clean It
Source: https://www.how-fixit.com/laptop-repair-guides/game_console/playstation-4/
Posted by: meldrumnobece.blogspot.com
0 Response to "How Do I Open My Ps4 To Clean It"
Post a Comment